Check out www.ThePerfectLoaf.com for all the info. You can make a starter following the directions there. If someone gives you a starter and you want to know the basics here is some info.
BuildASoil Sourdough Starter Feeding
Items Needed:
- Kitchen Scale
- 2 Glass Jars (I like the Weck Jars but any Wide mouth will do) https://weckjars.com/product/743-mold-jar/
- Stirring utensil – I like the Thermworks Mini Spatula https://www.thermoworks.com/Mini-Spatula-Set
- Organic Bread Flour (Really any flour you have will work)
Your starter will be very active and require twice daily feedings or you can put into the fridge to slow this down to once per week feedings.
How to know when I should feed?
Your starter will rise very fast over 4-12 hours and at a certain point it will “Peak” and stop rising and start to slowly fall. If you forget to feed it will be back to the normal starting volume and be a little thin. The goal is to keep it happily fed all the time but really it’s not a big deal if you miss 1 feeding. It will rise and fall slower in a cooler home and happen faster in a warmer home.
Basic Feeding Recipe:
- Place empty jar without lid on your scale and tare it to Zero.
- Add 4 Ounces cool water. Preferably Filtered Water but not 100% needed.
- Pour 4 Ounces of your starter. Your scale will = 8 Ounces now unless you Tare after adding water.
- Add 4 Ounces of flour
- Stir until well combined with no dry spots.
- Swipe around the edges to try to scrape as much into the jar as possible.
- Place lid on the jar loosely (Weck Jar with no rubber or Screw top just placed over the top.)
- Place in your preferred spot in your home.
- Discard the rest of your starter or make something with it. Favorites are Pan Fried starter with your favorite toppings, Crumpets, or also Pancakes.
- Clean your now empty Jar and place in your cupboard for the next feeding where you will use this jar and clean the other one.
How To Speed Up Starter:
- Use luke warm water if your home is colder or during winter to keep your starter rising smoothly.
- Use 5 ounces starter but still use 4 ounces of Flour and 4 Ounces water.
How To Slow Down Starter:
- Use Cold Water
- Use 3 Ounces Starter but still use 4 ounces Flour and 4 Ounces Water.
- Right after feeding place starter in your fridge and it will still rise over 1 week like it would normally in one day. Whenever your starter reaches it’s peak you’ll want to feed again no matter the timeline.
When to use your starter:
When your starter is peaking and you are ready to feed is the optimal time to make your dough. You’ll take the 4 ounces out as per above and your leftovers are now ready to be used in your dough instead of discarded.
Check out www.ThePerfectLoaf.com where I took much of this info and try the beginner loaf. Alternatively I’m going to post a 100% bread flour (or All purpose flour) Recipe below that is simple.
Basic 100% No Knead Bread Flour Formula:
Normally folding the dough will allow for better structure but I don’t want you to be intimidated by having to hang out and fold your dough every 30 minutes. You can really fold it loosely on your time frame but that is for another day. I’m sure I’m breaking all the rules but this bread will turn out great. The secret is to wait 24-48 hours before baking and we let the microbes do the work.
Items Needed:
- Covered Cooking Vessel. (This catches the steam and makes the best bread ever and you shouldn’t skip this)
- https://www.amazon.com/Lodge-Cooker-Pre-seasoned-Skillet-Convertible/dp/B0009JKG9M/
- You can find these at the Grocery store and the hardware store here locally: https://www.amazon.com/Lodge-Enameled-Classic-Enamel-Island/dp/B000N501BK
- Long Loaf Pan: https://sassafrasstore.com/superstone-covered-baker/
- Poor Mans Dutch Oven: https://www.youtube.com/watch?v=MxSbUYjBEEY
- Watch the rest of Steves videos on youtube for no knead yeast bread. Follow my recipe below for my no knead sourdough version.
- Parchment Paper Sheets. I like the pop up ones not the roll: https://www.amazon.com/Reynolds-Kitchens-Pop-Up-Parchment-Sheets/dp/B07L25WYS2
- 8 Ounces Starter
- Large bowl for combining all ingredients. I use the large glass mixing bowls because I make enough for 2 loafs.
- Upside down spoon handle to help stir it all together (or your bare hands)
- Spatula to scrape the bowl sides
- Plastic Wrap to cover the bowl for 1-2 days while you let it rise.
- Whisk or fork to stir salt into the flour. (Can use fingers I just like to get salt even)
RECIPE:
- In large mixing bowl pour your starter discard (Should be close to 8 ounces once you keep 4 ounces for feeding)
- Then on top of this I pour 2lbs of flour (32 ounces) About 5 cups.
- Add 1 Tablespoon Salt to the flour and without hitting the starter below stir the salt into the flour with whisk or fork or hands.
- Pour 25 ounces of cool water into your bowl and stir until well combined with no dry spots. I like using bare hands and constantly scraping the bowl or using the handle end of a wood spoon and stirring like a dough hook also scraping the sides with a spatula occasionally.
- Once combined cover with plastic wrap or plastic bag so it doesn’t dry out on top.
- Place on your counter for 1-12 hours depending on when you make it. (If it rises really fast then go do the next step after 1 hour or only a few. If it’s cold in your house and rising slow give it time to rise a bit longer before going to the next step. If you are unsure don’t overthink it.
- Either way, when you go to bed take your big bowl of dough and place it into the fridge to slow it down.
- When you wake up in the morning take a look in the fridge it’s probably almost doubled in size.
- You can bake your bread now by taking our of the fridge and following the next steps or you can leave in your fridge until later tonight. I like to get at least 24 hours and up to 48 hours of “fermenting” time before I bake and find that as long as it doubles in size it will work, otherwise I really like to let it go from 24 – 36 hours.
How To Bake the Dough You Made:
- Take dough from fridge and set on the counter.
- Place your Dutch Oven type device into the oven to preheat it. (This is super important)
- Preheat oven to 500 degrees or as hot as it will get.
- Preheat at least 1 hour to make sure your Covered Baker Dutch Oven thing is super duper hot.
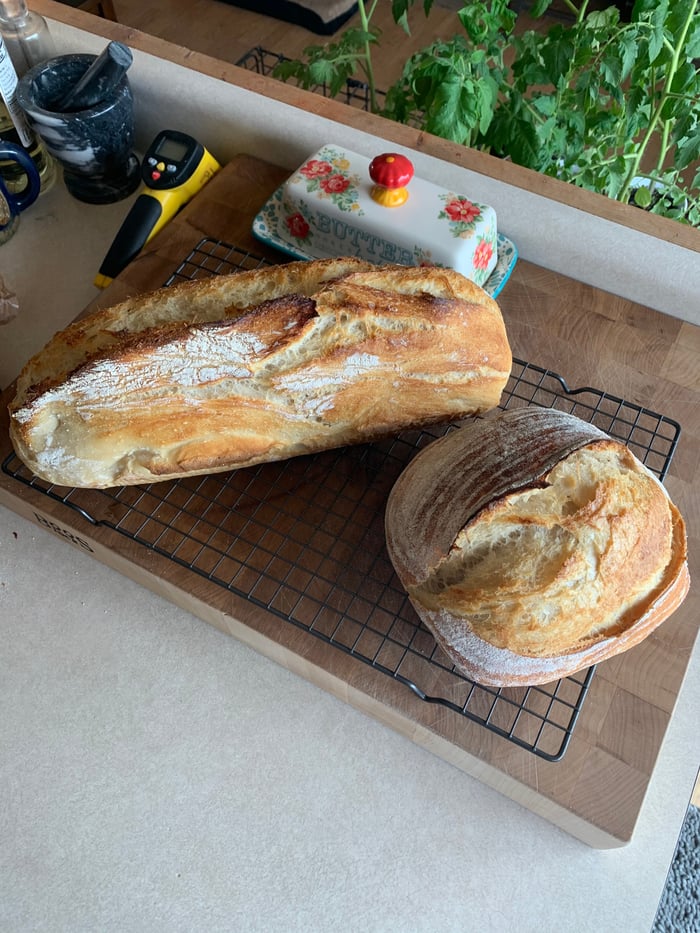
- While you are Pre-heating you’ll want to dump your dough onto a floured surface and separate it. Most often people will split it half and half and bake 2 loaves back to back. I have several containers and If I’m making a long loaf I’ll use about 70% of the dough for the loaf and 30% in my second vessel which is a Lodge Combo Cooker.
- Once you have separated your dough into portions you’ll want to press each one down to Degas it or kinda let the air out and pat it all down. I usually sprinkle flour on the work surface liberally and also on top of the dough.
- Watch this video to see details but remember we are using our own starter and not yeast https://www.youtube.com/watch?v=yePMpoyXwys&t=5s
- Once you have a flattened dough you’ll want to fold all the edges into the center overlapping to make a ball or if making a long loaf flatten out a rectangle shape and fold the edges overlapping like a burrito this way it will stay in a long shape like your bread pan. Most make round and that’s easy.
- Check out theperfectloaf.com for all the details on shaping etc.
- Okay so once you make your round or oblong dough shape you’ll want to set it into a well floured proofing basket or use the easiest way, a non stick pan (This allows you to pour your dough out into your final container or flip it onto parchment paper and then set the parchment paper with dough on top right into your vessel once ready. Remember your vessel will be piping hot so you want this transfer to be easy!!
- Let your dough rise again in the non stick pan or in your proofing basket for 1 to 1.5 hours while your oven preheats and vessel gets hot.
- Take your Super Hot vessel out of the oven with oven gloves or whatever and then take the lid off and pour your bread into it. Or easier flip your dough onto parchment and when you pull the hot vessel out of the oven lift the parchment with dough right into the vessel. Either way when the dough gets put into the hot container you can now Slash the top with a knife or razor or you can skip that step. (Cutting controls where the dough rips as it expands)
- Put your lid ON and then stick immediately into the oven and set timer for 30 minutes.
- Once Timer goes off take the lid off of the container and then close it back up and set the timer for 10-15 minutes. 10 Minutes for golden and 15 for darker crispier.
- Once 10-15 minutes has passed cooking with lid off go ahead and pull out of the oven and dump onto your cutting board or ideally a cooling rack. Be careful not to burn yourself.
- Let cool as long as you can at least 2-3 hours before cutting into to make sure it finishes cooking and doesn’t release moisture so it keeps well. This is why I make 2. I can never wait and we cut into one of them after like 20-30 minutes after cooling.
- Store by keeping in a bread box or I Often would wrap really loose in a paper towel and into a large ziploc bag left partially open. Or you can use a grocery bag… it’s just so dry here in Colorado that it helps if you don’t have a breadbox. Otherwise check out this article https://www.theperfectloaf.com/the-best-way-to-store-bread/

