How To Root Cuttings In Your Organic Soil System
This is how I do it (Most Of The Time) and you can too. That being said, there are many ways to clone and I’ve found that between planting seeds and cloning, almost everyone comes up with their own special routine. You’ll notice I don’t use any coconut water in the recipe. That’s not for any particular reason but it’s just how I’ve done it personally. You can use it if you like and see if your results are better than mine. These methods were passed down to me and many others on the forums from ClackamasCoots and I take no credit for the info. All I wanted to do was show everyone how well this recipe actually works in hopes that you will ditch the rooting hormone bottles and go the all natural route. It may look like a lot of stuff, but in action it only takes me a few minutes to get setup.
I personally take cuttings two weeks before I go into flower. That way I can make sure they all rooted and have one last emergency chance at it before the ladies go into flower.
NOTICE: There is a myth that you have to keep a mother plant and that clones of clones eventually lose vigor. This is preposterous and totally untrue. The only thing that causes bad clones are when you clone from an unhealthy plant. You can clone a clone from a clone forever.
List Of Items:
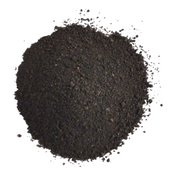
- Aloe Vera 200x Powder
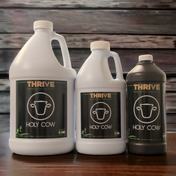
- Bio Ag Ful Power
- Agsil16H
- Plant Propagation Tray – Super Sprouter Quad thick
- Humidity Dome to fit your tray.
- Grodan Smart Tray
- Root Riot – Peat Cloning Plugs
- Spray Bottle for Foliar - I like the Chapin Model 1949 or 19049
- Cups to soak cuttings in, several if taking different types of cuttings.
- Bowl to mix 1 gallon of water and soak Root Riot Plugs in.
- Scissors or Razor
- Measuring Shot Glass or Measuring spoons
Instructions: Keep Everything Clean! No Dirty trays or Scissors. (I scrub every tray with soap and water)
- Mix Cloning Solution in your bowl. Cut recipe in half for a small cloning session, or water your houseplants with the leftovers, they deserve a special treat every once in awhile. If you don’t have house plants, go get some. At least an Aloe Vera and maybe a Money Tree.
- 1 Gallon Clean Water
- .33 Gram (1/8 Teaspoon) of Aloe Vera 200x Powder (No need to be 100% Exact)
- 20 – 30 ml Ful Power Fulvic Acid
- 5 ml of Pre-Mixed 7.8% Agsil16h solution
- Once this mixture is prepared pour a few ounces of it into a short glass or plastic beer cup with labels for each type of cutting. This is where you will soak your cuttings. Also set some aside for your spray bottle to use as foliar once cuttings are ready to go.
- Take your cuttings using scissors or a sharp razor.
- Pull the lower leaves off and prepare your cuttings, once prepared place them into the cloning liquid inside the designated soaking cup.
- While these cuttings are soaking, go ahead and toss all of the Root Riot Plugs you will require into the bowl with the majority of the original gallon of Cloning solution. Let these soak.
- Let your clones soak for at least one hour.
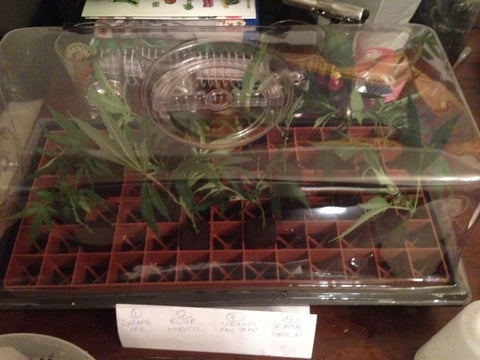
- Once ready, place your Grodan smart tray into the propagation tray and insert your root riot plugs into the square openings. I typically make rows of 4 cuttings and leave space between the rows so that I can label the type of varietal in each row and keep track.
- Then place your cuttings gently into the whole provided within the Root Riot Pucks and be careful not to force them too hard or you will snap the stem.
- Once the cuttings are in the tray and ready for the dome you will want to then foliar spray with the same solution you used to soak the cuttings in.
- Place the Humidity dome on the tray and place the tray away from direct grow lights. I personally leave it way to the side of a grow tent only receiving ambient light from my T5. I have also used Home Depot Shop Lights with good success. The key is to have just enough light for the plant to produce roots but not enough for it to attempt to grow. If the plant tries to grow it will use the nutrients in its leaves turn yellow causing it to lose health stress out.
- Temperatures are key and I prefer 70-85 Degrees and once daily inspection by lifting the dome and making sure none of the pucks are getting dry. If they are getting dry or if the humidity is too low I will Foliar Spray with Aloe Solution or plain water. I also make sure to spray the pucks to keep the moist when I do this.
These are the rooting pucks that I use. I like them because when you pull on the corner of one it stays together and doesn't crumble apart.

This is the Super Sprouter Tray that I really really like. It's MUCH thicker and won't buckle when carrying it around with weight in it.

This is the Rooting Tray That I really Like. It's double sided and durable. (Just Imagine It's Not Upside Down)

Here is the Dome. It has Side Flow through vents and a top Vent. I like it, but any tall one like this will do.

Getting Ready to make the recipe.

How I Use My Agsil16H for ease of measuring. Clear Bottle So I know it's mixed properly.

Make your bowl of solution and then take cups for each type of cutting you will be taking. Label the cups with the cutting name and pour a little bit of the freshly made solution into each cup. When you take your cuttings and prepare them, you will soak them in the labeled cups for at least one hour while the rooting pucks soak.

This is how I mix the aloe first. I like to activate the saponins by really shaking it together in here. (Some warm water from the bowl was used to keep the Gallon ratios even and accurate)

Take Cuttings of newer growth with at least a couple nodes on it. (Old stiff woody growth won't work well)

I then pull the lower leaves off and downward. Sometimes the leaf pulls a thin layer of the stalk off with it and that's perfectly fine.
This is what it looks like when the leaves are taken off except the top. I don't trim the fan leaves off but you can if you are taking many clones and they will be crowded together.


After at least one hour and up to 12 hours I like to take the pucks out of the water and then set them into the tray gently. Don't squeeze them as that will close some of the air bubbles out of the pucks and drain too much water out... these things are perfect right out of the bucket of solution.
I line mine up in rows two wide and alternating so there is space between each cutting. See Photo Below.
I label them like this and then snap a photo, then I don't have to keep the labels, you can do this however you want.

Insert Cuttings gently, don't force them or you will snap the stem. If this happens cut the clone shorter and try again. Also keep clones with bigger leaves in the center and away from the sides where your dome will pinch the leaves etc. If you are worried about it you can trim all the tips of the leaves off.

All ready to go into the veg room or under the clone light.
See that spot way out of the direct light? Yeah, that's a great spot. Too much light will cause yellowing as the plants attempt to grow. You want little light as this will promote rooting. I even think you could clone in the dark, but I'm not 100% sure how effective that would be.

Now Make sure the dome is all closed up and foliar spray. I didn't use a heating mat here because it was Very warm and humid in the tent. But I encourage you to use one as long as your area is below 85 degrees or the night is too cool.

Foliar Spray with this same mixture and make sure it gets really humid.

Open the dome at least once per day but preferably once at night and once in the morning. You can start to vent the dome after a few days depending on your local environment. I live in Colorado and it's dry so I usually leave them closed mostly until I see roots then I Crack them a little more each day.
They should look like this the whole way, no yellowing Etc.

On Day 6 Start Checking for roots, or just wait until day 10 when most will be rooted.
This is Day 6!!!

About half looked like this at day 6-8 and the other half by day 10... with a few stragglers. I left the stragglers and took care of them until around day 15 or so and this is what they looked like.

I would rather transplant a day after I see the first roots pop.
I usually clone into small square cups so that I can keep them under a humidity dome and slowly harden them off once transplanted.
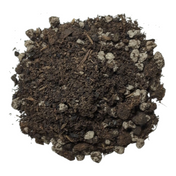
These are the cups I transplant into (I use BuildASoil Living Organic Soil Right Away) I put them in a tray under a dome and then slowly open the vents and after a few days remove the lid and then eventually under the full light. Once roots are popping out I'm ready to use this clone finally!